Skip to content
Betsy Lyon Creative
  • About
  • LinkedIn
  • RESUME
  • Contact

UX Design Process

As a UX/UI and Experience designer, I would like to walk you through an example of my work and my process. I chose a feature that I worked on while at WorkSpan, where we were designing and building an Enterprise SaaS product.

Step One: Review the PRD

All new features started with a PRD (Product Requirements Document). I worked closely with the Product Manager to develop this document that identifies the elements that was going to go into the feature, including the end goal, the zero states and the warnings that go with everything we created. This was delivered as a PDF.

Step Two: Create Personas

We had to know our audience to design a great feature well. All the different users have their own perspectives, needs, and objectives. These personas helped me put their shoes on and walk through the feature as they would. That way I could anticipate anything that didn't work for that user.

Step Three: kickoff meeting

When we had a good idea of what we were going to make, we pulled in the head of engineering and one front end developer to review the project. That way they had an opportunity to flag anything that would be difficult to build, and also to offer ideas if they had any. This helped us to avoid any road blocks that we may run into down the road by addressing it early.

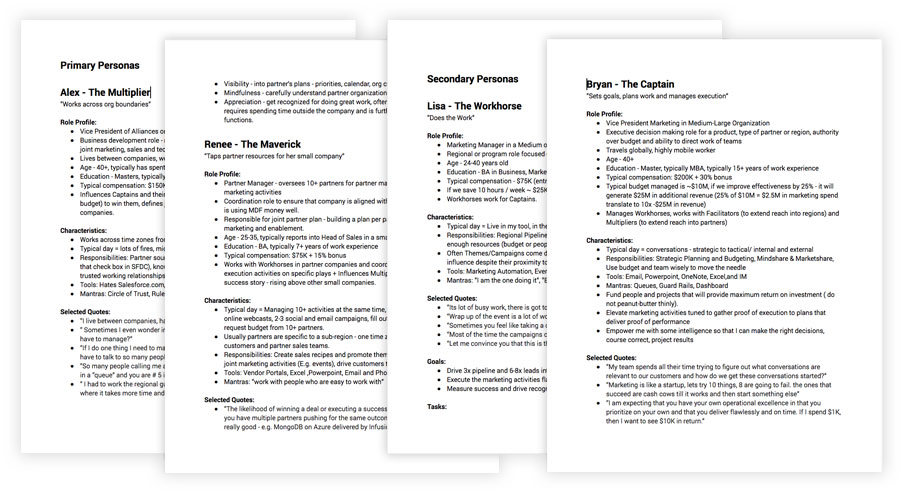
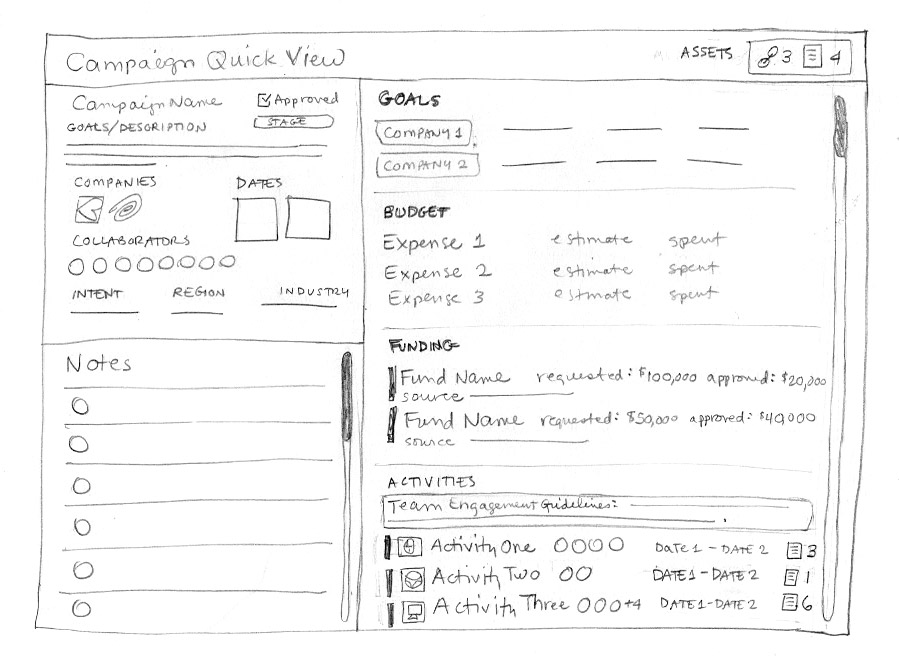
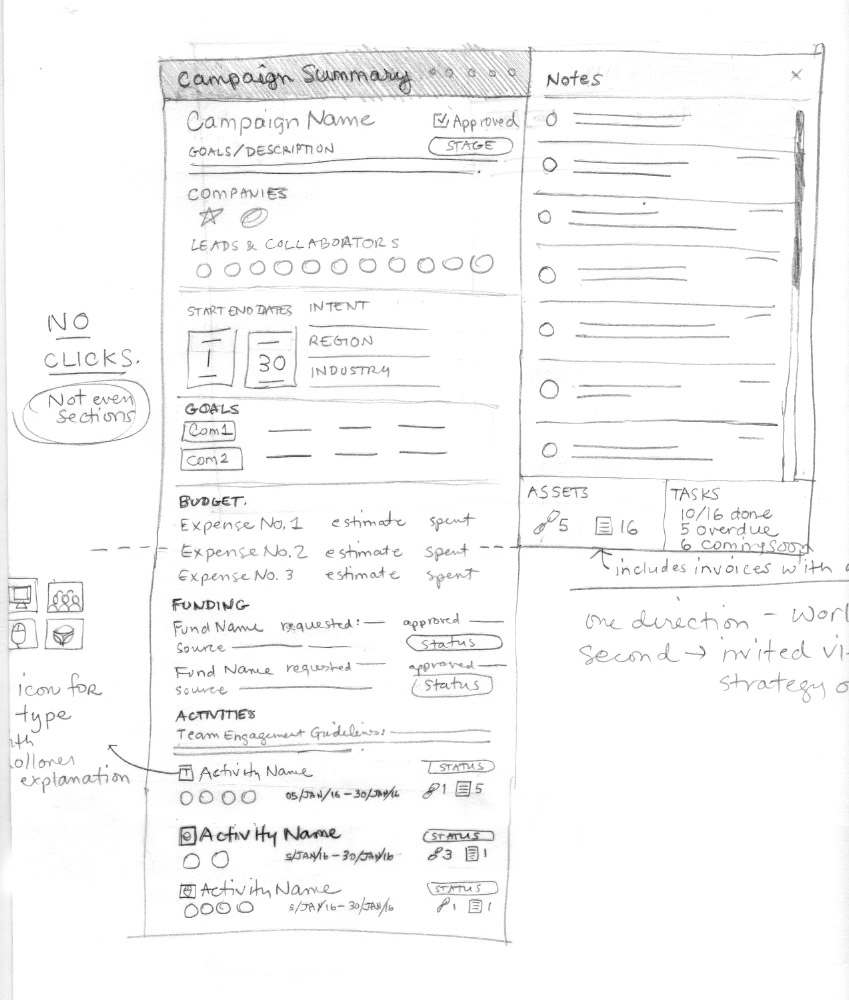
Step four: Sketch It Out

At that point, I got out my notebook and just start sketching! My ideas always start as a vision in my head, with the knowledge of the objectives and personas to support my ideas. I worked them out sloppily until I had something that made sense, and because there was more than one right way, I created a few versions from which to start.


Step five: prototype

After I had a review with my team and any changes had been made (such as elements being added or removed), and a direction was agreed upon, I started building it out for reals. At that point, I got into UXPin and started building a loose flow. But what I found more descriptive and easy for everyone to understand was a low-fi version of the flow using layouts created in Sketch, and then connecting those layouts using InVision.

Step six: design layout versions

Once an initial flow looked good, I got into the visual design. Here are some examples of the subtle variations that I designed for the Campaign Overview feature. I followed brand guidelines that we had established for WorkSpan; in fact, I created the WorkSpan brand style guide, using Frontify.


Step seven: consult with engineers and Front end developers

Once I got sign-off on the design and flow, we had a pow-wow with the engineers who were going to build the feature to review the project and field any questions or concerns. We would work with them to establish a road map for how they were going to build the feature.

Step eight: test the built product

At WorkSpan, we used our own team members to dogfood the new feature we built. We compiled all the feedback and got a preliminary idea of what worked and what we should  keep working on. Once it looked good, we sent it out into the wild. We had a few big name corporate clients who were our first adopters and actual end users, whom we used to help inform the product. And then...

Step nine: launch and iterate!

As one does when following Design Thinking, we gave the newly built feature stress tests and continued to get feedback and improve whatever needed improving. Sometimes we removed elements to simplify the experience.

I enjoyed the entire process from top to bottom, and I was proud to have helped create a tool that improved business, and the lives of those who were in it.

Home  |  Visual Design  |  User Experience Design  | Display Advertising  | Infographics  |  About  |  Contact


©2020 Betsy Lyon. All Rights Reserved.